want to learn how to use ai? check out our community!
Understanding Sublimation Inks and Papers: What Beginners Need to Know
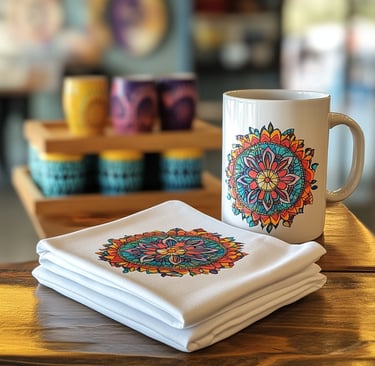
If you’re new to sublimation, you’ve probably realized there’s more to printing than just picking a design and hitting “print.” Two of the most critical components in your setup—sublimation ink and sublimation paper—can make or break your final result. In this guide, we’ll break down the basics of how sublimation inks and papers work, the different types available, and how to choose the right ones for your projects. Consider this your cheat sheet for understanding what goes on behind the scenes of every vibrant, fade-proof print.
Melissa AF Harmon
6/3/20253 min read
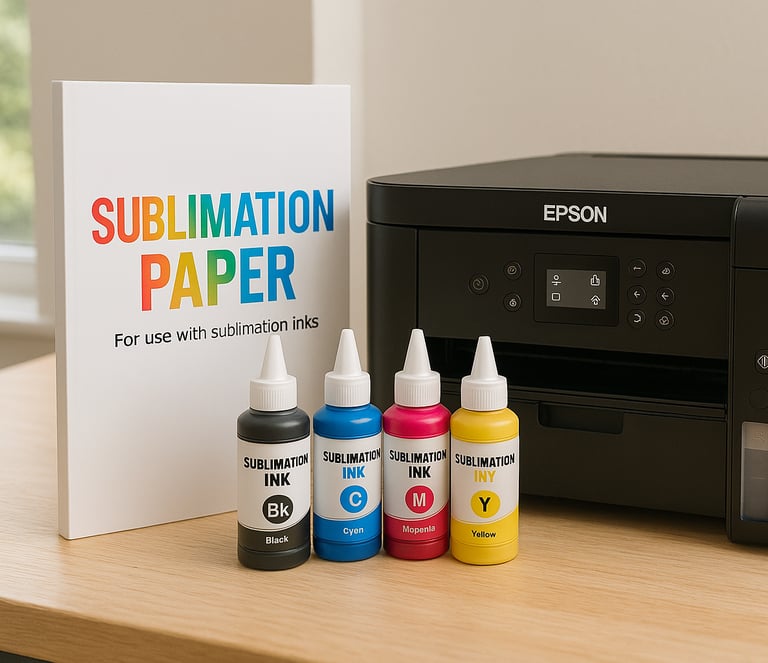

Sublimation ink is a special type of dye-based ink designed to turn into gas when exposed to heat—this process is known as sublimation. Unlike regular ink, which sits on the surface of your material, sublimation ink bonds at a molecular level with polyester-based surfaces.
This is what gives sublimation its vibrant, permanent, no-peel finish. The design doesn’t sit on top—it becomes part of the surface itself.
Pro Tip: Never mix sublimation ink with regular ink. Use dedicated printers or convert a new inkjet printer and stick to one ink brand for consistency.
What Is Sublimation Ink?
Types of Sublimation Ink
Not all sublimation inks are created equal. The type of ink you use can impact color vibrancy, print longevity, and even printer maintenance.
1. OEM (Original Equipment Manufacturer) Inks
Made by printer brands like Sawgrass—reliable and high quality, but pricier.
2. Third-Party Sublimation Inks
Affordable options for converted printers (like Epson EcoTanks). Require manual color profile setup and occasional maintenance.
3. Ink Format: Bottles vs. Cartridges
Cartridges: Used in Sawgrass or Ricoh printers
Refillable bottles: Ideal for EcoTank-style printers
Pro Tip: Once you choose a brand, stick with it to avoid chemical reactions and clogged nozzles.
What Is Sublimation Paper?
Sublimation paper is specially coated to hold sublimation ink and release it efficiently under heat. It’s what turns a printed design into a vibrant, lasting transfer.
Benefits of sublimation paper:
Fast drying
High ink release
Designed for clean, crisp transfers under heat
Pro Tip: Print on the bright white (coated) side of the paper—using the wrong side will lead to faded results.
Choosing the Right Sublimation Paper
Different projects call for different paper types. Here’s how to make the right choice:
Light vs. Heavy Paper (gsm)
100–120 gsm: Better for fabrics
120–130+ gsm: Ideal for hard surfaces like mugs and metal
Paper Compatibility
Check product listings for printer compatibility: Epson, Sawgrass, or Ricoh
Visit the manufacturer’s site or ask the community if unsure
Look for sample packs to test before you commit
Recommended Beginner Brands:
A-SUB
Koala
HTVRont

Paper and Ink Compatibility
How to Match Ink & Paper:
Use paper made for your specific printer type (Epson, Sawgrass, etc.)
Match the ink’s drying speed with the paper’s absorbency
How to Tell Which Paper Fits Your Printer:
Check packaging or product listings for compatibility info
Look for phrases like “For Epson” or “For Sawgrass”
When in doubt—ask the seller or test with a sample pack
Use ICC Color Profiles:
Especially important for third-party ink. These profiles improve color accuracy and output.
Pro Tip: Always do a few test prints when trying new supplies. Slight mismatches can cause unexpected results.
Storage and Handling Tips
Keep your materials fresh and functional:
For Paper:
Store in a cool, dry place
Keep sealed to avoid moisture and curling
For Ink:
Store in a dark, room-temperature location
Shake gently before use (if using refillable bottles)
Use within shelf life (check expiration date)
Pro Tip: Date your ink and paper packs so you always know what’s fresh.
Common Issues and Troubleshooting
1. Faded or Dull Prints
Fix: Check temp/time/pressure. Use high-quality ink and paper.
2. Smudging or Blurred Images
Fix: Use fast-drying sublimation paper. Ensure your design is completely dry before pressing.
3. Ghosting (Shadow Effect)
Fix: Use heat-resistant tape and avoid lifting the press too early.
4. Uneven Color Transfer
Fix: Make sure your press is level and your blank is properly aligned.
5. Washed-Out Designs (on Fabric)
Fix: Use 65%+ polyester material—sublimation doesn’t bond to cotton.
6. Black Looks Wrong in Final Pressed Print
If black appears greenish: Your temp is too low
If black appears brownish: Your temp is too high
✅ “If it’s green, get mean (increase the temp). If it’s brown, turn it down.”
Pro Tip: Keep a “fail folder” and jot down settings that worked (or didn’t) for future reference.
Sublimation inks and papers are the heart of the printing process. When you know how to choose them, store them, and troubleshoot them, you set yourself up for long-term success.
Now that you're equipped with this knowledge, go forth and press with confidence—your best transfer yet is just around the corner.
Melissa AF Harmon Creative, LLC
Simplifying systems for creative entrepreneurs and educators.
© 2025. All rights reserved.